
Prototypes are often used to validate that something works, but they can also help bring attention to missing elements or feature improvements. Without prototyping, the UX design process would be far more time-consuming.
Prototypes encourage and enable iterations before a final product is developed, helping companies get to the best end product in the least amount of time and with the least amount of design resources wasted along the way.
Of course, not all prototypes are created equal.
Knowing how to prototype means knowing the difference between low-fidelity prototypes and high-fidelity prototypes, and when you should use one over the other.
Low-Fidelity Prototypes
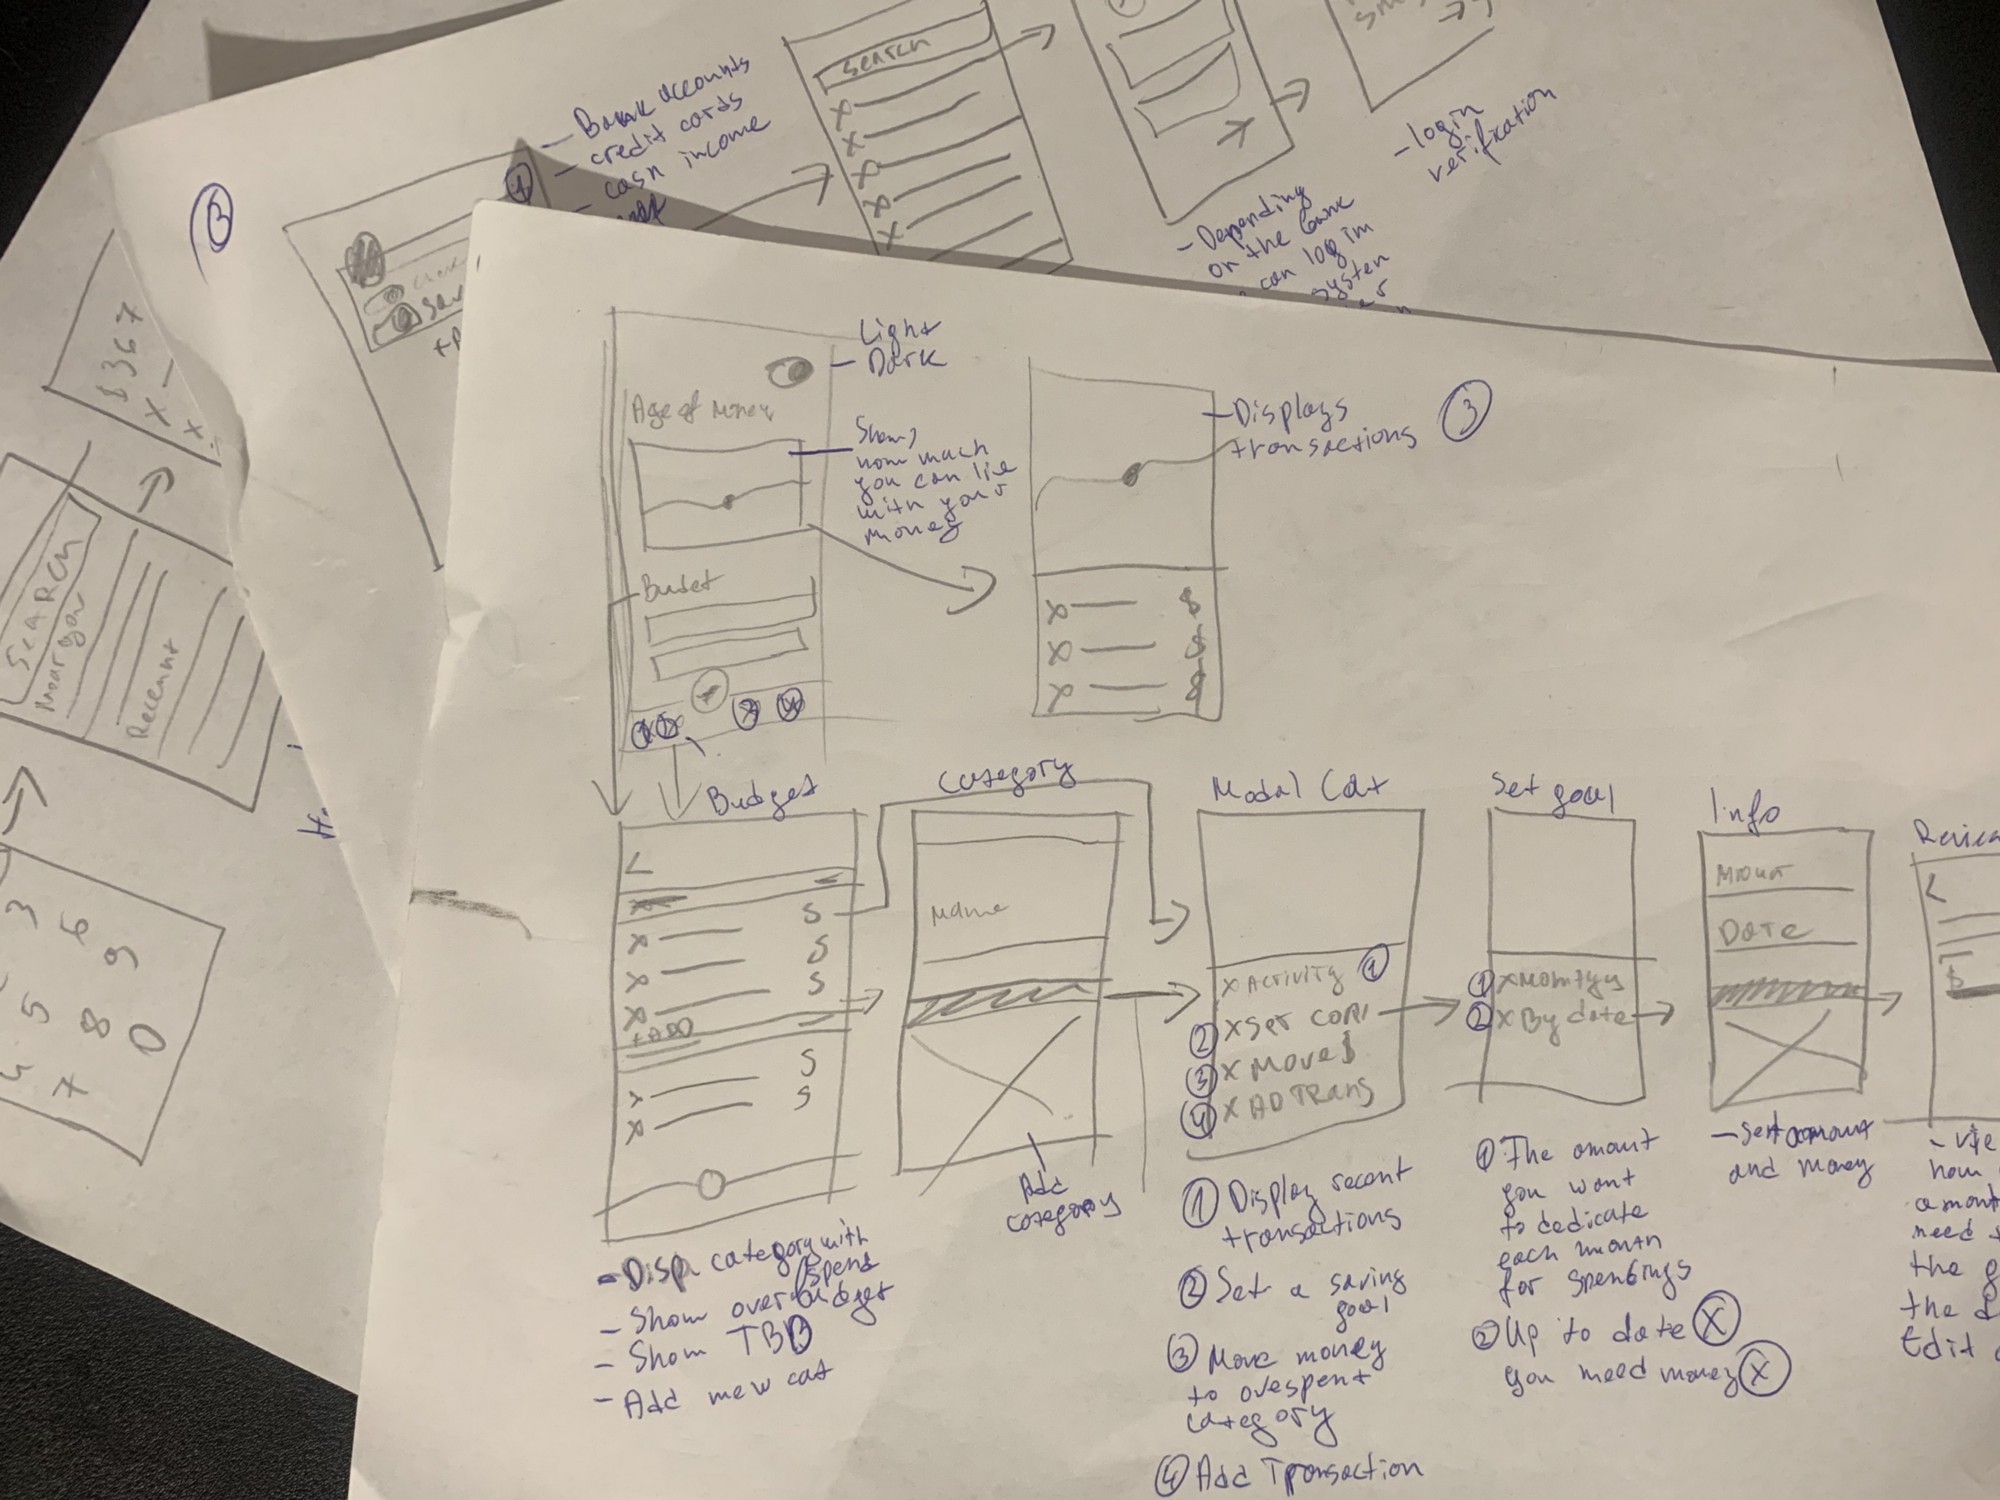
A low-fidelity prototype focuses on testing user flows and how information is presented. Low-fidelity prototypes may appear on paper or in the form of a digital wireframe. In any case, a low-fidelity prototype is often seen as “step one” when designing a new user flow or layout.
Depending on the project, low-fidelity prototypes can be very basic–like a hand-drawn prototype with no color or content—or more detailed. The purpose of a low-fidelity prototype is to help visualize layout, test user flows, and test the navigation experience.
A basic eCommerce checkout flow is a good example of a low-fidelity prototype. Designers simply create a digital wireframe for core pages with buttons linking them together so that testers can experience navigating between the home page to a product page, to the cart page, to the checkout page, to the confirmation or thank you page.
During this low-fidelity test, users will be asked to make sure each page is laid out in a cohesive manner, that all the basic elements are there, and that navigating forward and backward through this flow is easy. This helps designers confirm that they’re on track early-on in the process. Still, high-fidelity prototypes will come in handy down the line.
High-Fidelity Prototypes
The purpose of a high-fidelity prototype is to understand how users might interact with various elements and the finalized layout of the website. With a high-fidelity prototype, things are much more detailed—this is when the final product takes form. Mockups will always feature both color and content, and the best high-fidelity prototypes will look and function almost exactly like the real thing will.
A high-fidelity prototype is expected to have interactive elements, along with things like transitions and animations that help immerse the user in the experience. As such, high-fidelity prototypes are the best choice in a usability study or if a design team is presenting its concept to stakeholders.
While a basic eCommerce checkout flow is an example of a low-fidelity prototype, a high-fidelity prototype for the same project would be updated to include color, content, calls-to-action, images of the products, pricing, discount codes, and other features. Interactions, like a pop-up when a user adds the product to their cart, will also be integrated into the high-fidelity prototype.

Pros and Cons of Low-Fidelity Prototypes
There are two basic types of low-fidelity prototypes: Paper or hand-drawn prototypes and digital wireframes. Both are extremely basic, which works for just getting a concept out there, but isn’t ideal when trying to help someone not on the design team visualize what you’re going for. Still, low-fidelity prototypes have their place in the design world. Here’s a look at the pros and cons of low-fidelity prototypes.
Pros
- It doesn’t take long to create a low-fidelity prototype. The speed is a major advantage, allowing a designer to quickly jot down their ideas and show them to others.
- Altering a low-fidelity prototype is also super easy. This makes bringing a low-fidelity prototype along to a design meeting or test session very useful, as the designer can alternate it on the spot to visualize new ideas.
- You don’t have to be a skilled artist to create a low-fidelity prototype. They’re often made using just simple shapes and lines, so that allows even non-designers to propose changes and share their vision.
- The speed and simplicity of a low-fidelity prototype make them extremely time and cost-efficient, which allows teams to go through countless variations with little commitment.
Cons
- By nature, low-fidelity prototypes are extremely basic in form and function. This can make it difficult to get intricate visions across to others, especially when communicating with a non-designer. A lot of explanation may need to accompany the low-fidelity prototype, which can slow things down and create confusion.
- Stakeholders often struggle to visualize the end product when presented with a low-fidelity prototype, and that can lead to negative feedback before the project is even underway. For this reason and the above reason, a high-fidelity prototype is preferred when presenting to non-designers.
- Because low-fidelity prototypes lack real functionality, it can be difficult to get accurate feedback during testing. Users will know that the prototype is simple and incomplete, so they may make assumptions that aren’t accurate to the vision.
- The overall effect of a low-fidelity prototype is often underwhelming because they lack color, content, and interactions. This is unavoidable, but it makes showing a low-fidelity prototype to a non-designer that much more risky. If they can’t visualize everything you do, it can hamper their support.

Pros and Cons of High-Fidelity Prototypes
Designers can use high-fidelity prototypes in two ways: Either by creating mockups that accurately depict appearance and function; or by coding a digital prototype that looks and functions just like the real thing. The latter often has a much greater “wow” factor, but it also takes more time and resources to create. In either case, high-fidelity prototypes have their advantages and drawbacks, so keep the following in mind.
Pros
- If you’re running a usability study, a high-fidelity prototype will get you much better results than a low-fidelity prototype simply because participants will be able to interact with it exactly as they will interact with the end product. This leads to much more meaningful feedback.
- In order to test interactions, transitions, animations, and all other “living” elements of the design, a high-fidelity prototype is a must. A low-fidelity prototype simply can’t show how these things will look or feel.
- When presenting to stakeholders, high-fidelity prototypes are the best option because they most accurately represent the final product. They leave little to the imagination, which helps avoid confusion and misunderstandings.
- High-fidelity prototypes simply have that “wow” factor that’s necessary when looking for buy-in, funding, or pitching a concept to a client. It’s tough to get someone on board with a low-fidelity prototype alone, especially if your idea is stacked up next to others.
Cons
- The biggest downside of a high-fidelity prototype is the sheer time it takes to produce a good one. Designers will have to spend a good deal of time designing the prototype in detail, and that means they take more time and money to produce.
- When it comes to making changes to a high-fidelity prototype, they also take more time compared to a simpler low-fidelity prototype. This adds time and money to the design process, and it’s a key reason why you should use low-fidelity prototypes to perfect the core layout and other elements before building upon it with a high-fidelity prototype.
- Some UX designers can get tied up in making the high-fidelity prototype presentable, or they get distracted because they don’t yet have clear objectives from the marketing team. This can cause them to overthink or overdo animations and other interactions.

Learning How to Prototype Efficiently
The steps for creating a prototype vary depending on whether you’re opting for hi-fi or lo-fi, and the type of prototype you’re pursuing. In reality, knowing how to prototype is not a matter of being really good at drawing or being able to produce mockups faster than anyone else. Knowing how to prototype properly comes down to efficiency, and a major element of efficiency is choosing the right kind of prototype.
Here are some explanations that will help you decide when to choose a lo-fi prototype over a hi-fi prototype, and vice versa.
When to Use a Low-Fidelity Prototype
In general, a low-fidelity prototype is ideal for the early stages of design. UX designers should turn to low-fidelity prototypes, especially paper ones, as they just begin iterations, as this will help them collaborate with the other designers more easily while committing as little time as possible to sketching out the initial concepts, which will likely undergo major changes.
Low-fidelity prototypes are ideal for design sprints because of how quickly designers can cycle through and change their ideas. That’s why they should be your go-to when you first start working on a project. Don’t spend time sitting at your computer or doing anything more until you’ve got a low-fidelity prototype that you like on paper.
Another good use case for a low-fidelity prototype is to help teams as they start to structure information and create user flows. While they don’t have the “wow” factor of a high-fidelity prototype, low-fidelity prototypes still play a crucial role in testing the bare bones of a user flow before you commit to creating a more detailed mockup.
With all of that in mind, there are also some instances where you absolutely do not want to use a low-fidelity prototype. Mainly, you’ll want to avoid low-fidelity prototypes when running a usability study as the vagueness of the design rarely leads to meaningful feedback. If you’re presenting a concept to stakeholders or to a client, you might also find it worthwhile to invest in a high-fidelity prototype because it can be difficult for those not on your design team to visualize its full potential.
When to Use a High-Fidelity Prototype
While low-fidelity prototypes play a crucial role in the early phases of design, the team should move on to a high-fidelity mockup about mid-stage. Typically, design teams will hold at least one user flow test with low-fidelity prototypes and make any necessary changes before they invest in a high-fidelity prototype.
Since high-fidelity prototypes are supposed to look and function as close to the end product as possible, UX designers will need to take the time to add elements, color, content, and clickable links. With that said, the final details of a high-fidelity prototype, like animations and transitions, should not necessarily be added early on. Oftentimes, transitions and other interactions are not added to a high-fidelity prototype until after the first usability studies are completed.
UX designers should use high-fidelity prototypes to play around with interactions and understand how user movements, such as scrolling, impact the content and elements on the page. At the end stage of the high-fidelity prototyping, the final details will begin to take shape. Once the interactions and other aspects are finalized, that prototype is given to the engineering team so they can turn it into a functioning website.
Although high-fidelity prototypes are incredibly useful, they’re also time-consuming and resource-intensive to create and change. This means you should not use a high-fidelity prototype right out of the gate. Hi-fi prototypes should only come after lo-fi prototypes have been thoroughly explored and discussed.